The student view contains information regarding the student that is highlighted in the student tracking list.
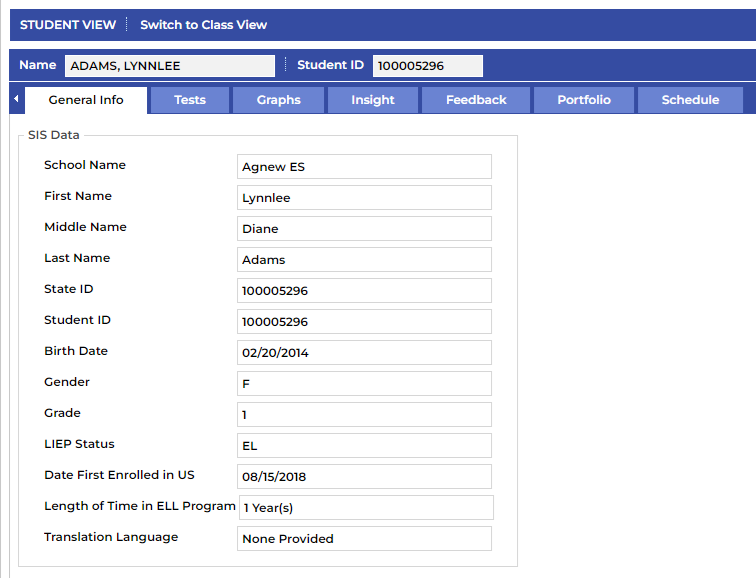
¶ General Info Tab
The General Info Tab contains basic demographic information about the student selected.
¶ Tests Tab
The Tests Tab displays the tests that have been uploaded or entered for viewing for the student selected.
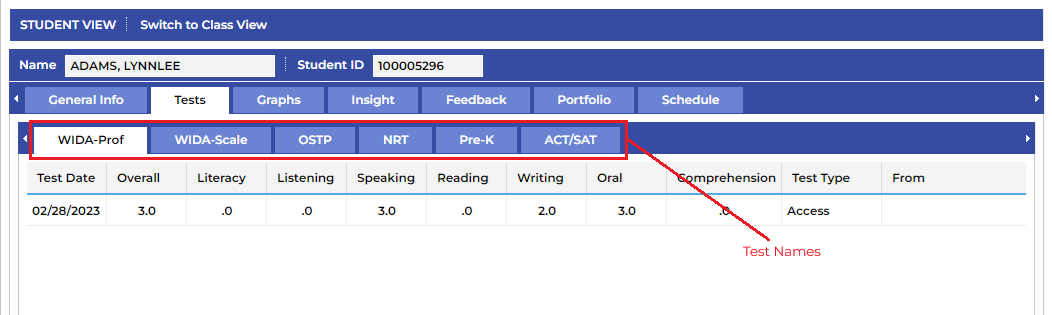
¶ Watch the video below to learn more about the Tests tab.
¶ Graphs Tab
The data displayed here is a visual representation of the student’s WIDA test score history.
You can select and/or deselect each domain/composite test result by clicking on the name in the legend to the right.
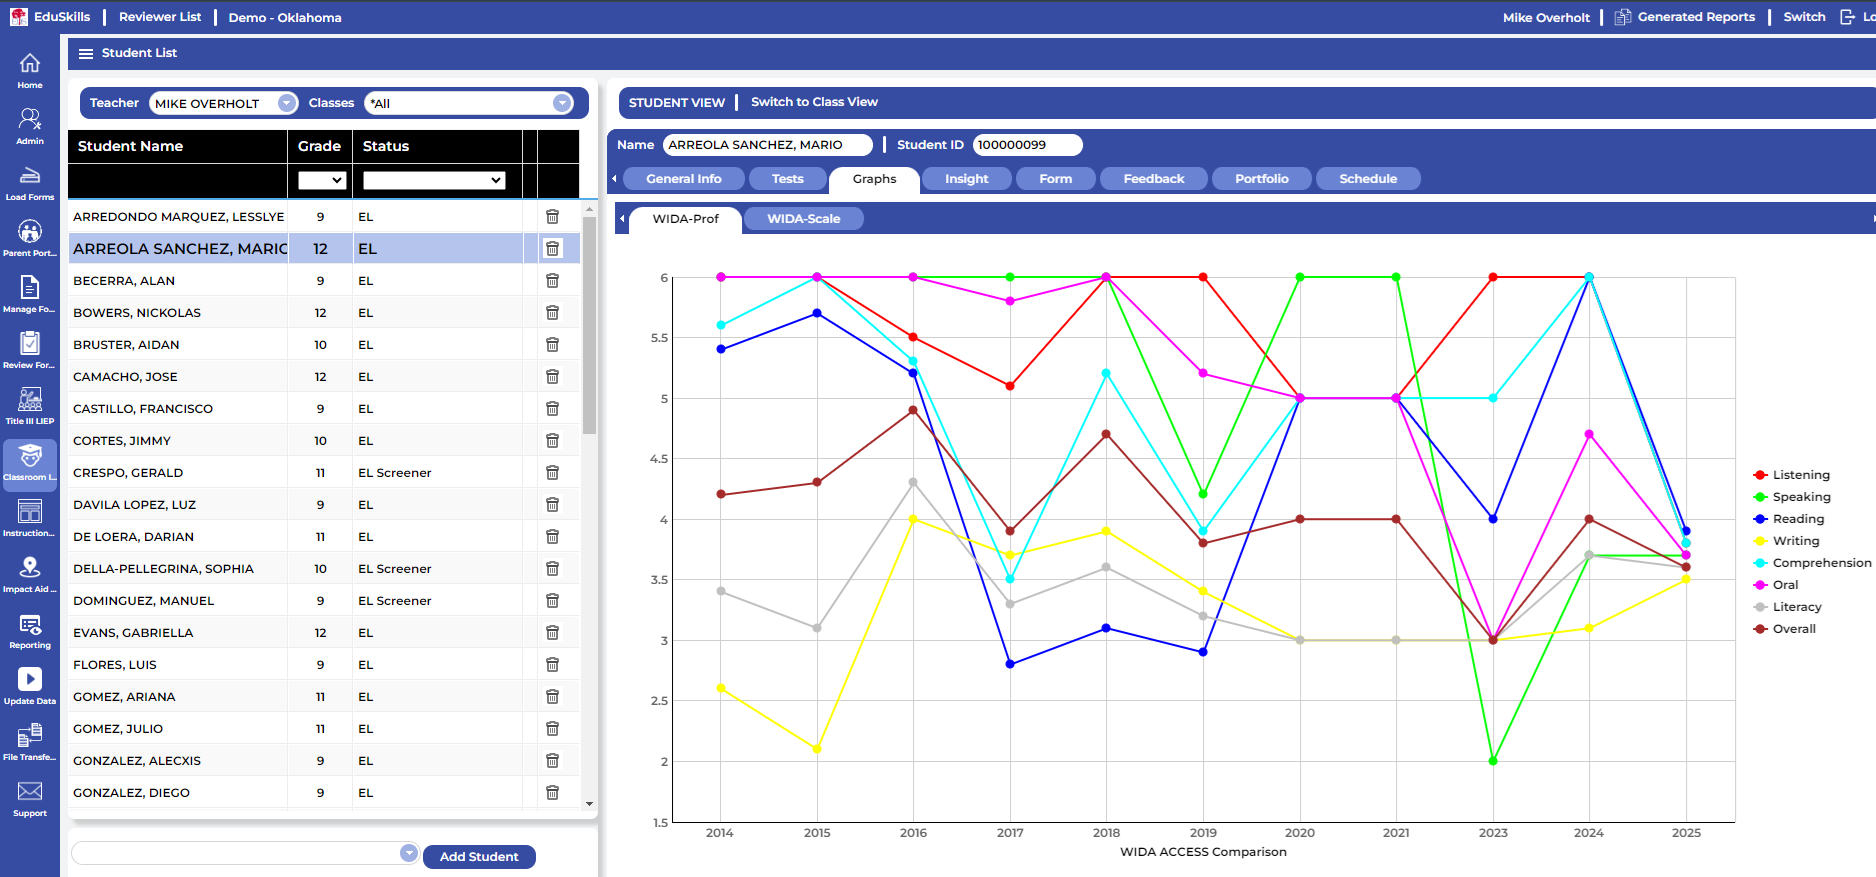
¶ Watch the video below to learn about the Graphs Tab.
¶ Insight Tab
This tab displays all of the selected student’s assigned accommodations and LIEP goals.
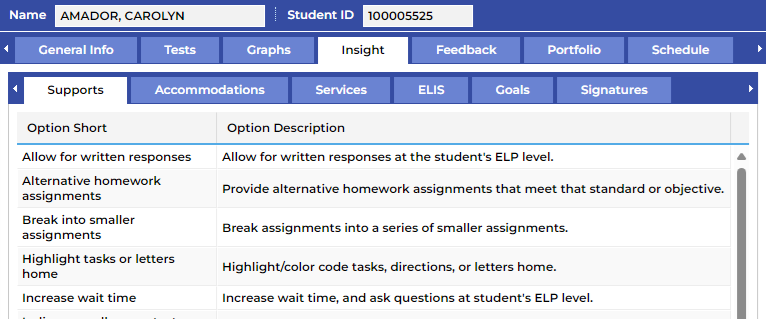
- Supports displays all classroom supports that have been assigned.
- Accommodations displays all State & WIDA test accommodations that have been assigned.
- Services displays all of the EL Services that have been assigned.
- English Language Intervention Strategy (ELIS) displays all of the ELIS coding that has been assigned.
- Goals displays all of the goals that have been automatically assigned based on WIDA test results.
¶ Watch the video below to learn about the Insight Tab
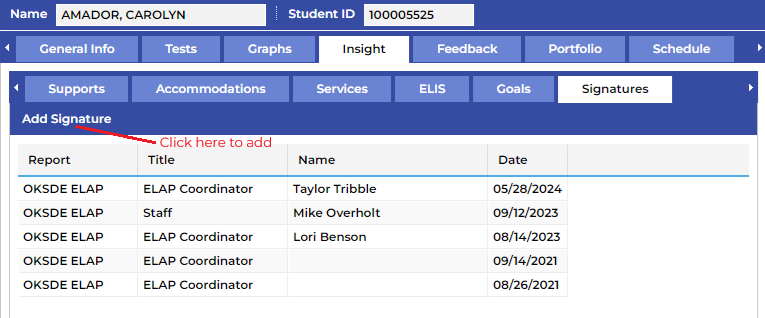
¶ Signatures
Signatures are required on all ELAPs. Digital signatures can be added under the Insight/Signatures tab and will be displayed on the OKSDE ELAP. Once you are in the Signatures tab, click Add Signature, check the box to confirm that you have read and understand the expectations, click Add, and your signature will be saved and displayed on the OKSDE ELAP.
How to sign an ELAP as a Classroom/Content Teacher.
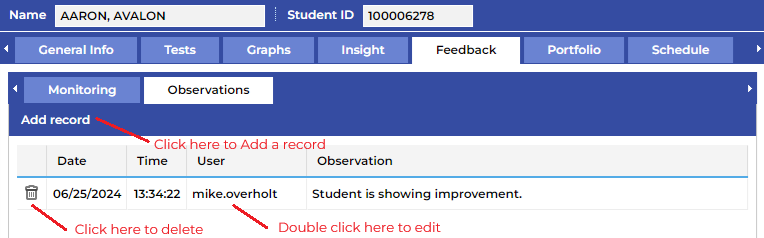
¶ Feedback Tab
This tab allows you to add monitoring records and observations for the selected student.
¶ Monitoring Records
Monitoring records for all students who have met exit criteria on the WIDA ACCESS test and have entered into proficiency can be created and managed in this tab.
¶ Observations
Observations are notes that any teacher that is assigned to this student can see. An observation can be added by clicking on Add Record or can be edited by double clicking on the record. A record can also be deleted by clicking on the trash can on the left of the record.
¶ Watch the video below to see how to enter an Observation for a student.
¶ Portfolio Tab
Use this tab to generate multiple reports for an individual student. Choose the report(s) to be created by checking the box and selecting what will be included in the report and then click Create Report.